I'd previously dismantled by initial attempt at a bridge for my wide river sections made using old MiniBrix as it was too large and the ramps were too steep. I kept the base of the bridge and reduced the height to 2 courses of MiniBrix. The base has sat for a long while on a shelf by the modelling desk.
So for a project over the bank holiday weekend I decided to make two new bridges, one suitable for 40/54mm and another for 28/40mm. I decided to work on the one for the 40/54mm figs first.
I made some ramps of card and foamboard to fit with the old bridge base ....
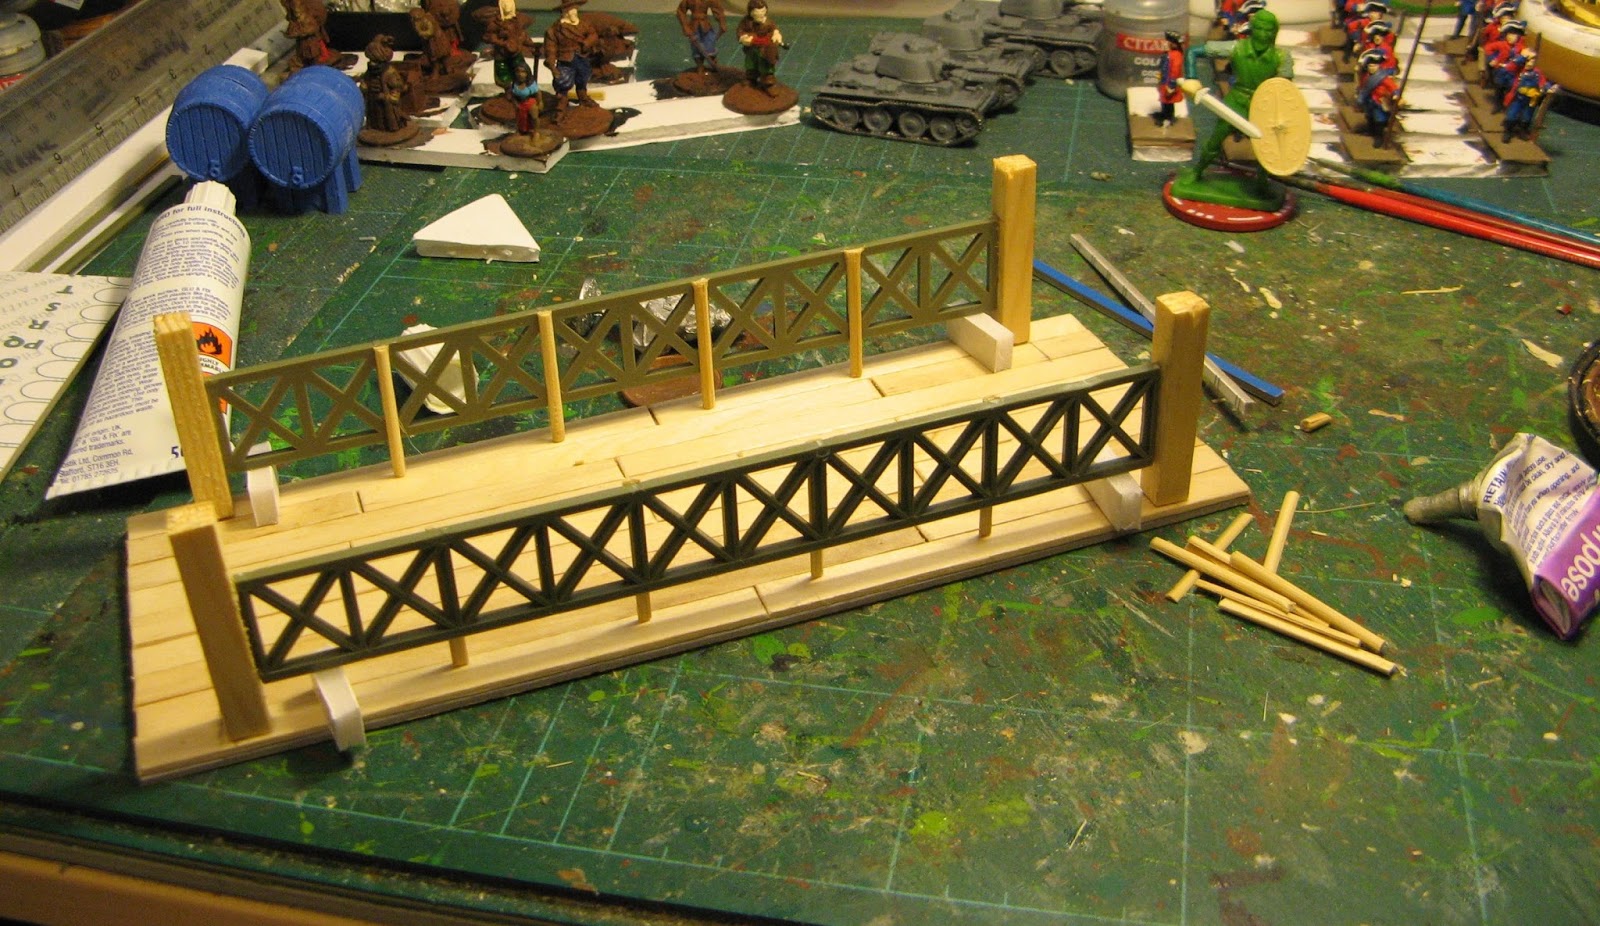
Then I made a wooden bridge deck of coffee stirrers on card base..
added some small mosaic effect vinyl tile to the ramps and did a trial fit ...
Next the side rails for the wooden bridge, I used the sides from an Airfix bailey bridge kit. The intervening posts between the two end ones are split hibachi skewers stuck to either side with the gap at the bottom filled with card...
Trying it out with some 40mm figs
The end posts are a little high so I trim them down and get it all painted. I'll start work of the bridge for the 28/40mm figs next - I'll use the same ramps so just the main part of bridge to make.


5 comments:
Wow, that looks really, really good! How you did the water effect?
very impressive!!
_Peter
I love it when a good idea comes together.
Thanks for the note of sanity in a mad bank holiday weekend.
Douglas,
that was good idea to use the sides form the Airfix pontoon bridge - thanks
Alla
Peter,
the river sections were made acrylic sheet plastic (found this stuff difficult to cut curves in). On one side I sprayed the edges brown then mid-blue on top of the that.
-- Allan
Thanks, Allan. This is a fine technique, it seems to be more easy than with the artificial water gel. You did the water effect so marvellously.
_Peter
Post a Comment